


There’re numerous reasons why certain websites are blocked on the Internet. Your office or university blocks websites internally in order to prevent you from distracted – such as enjoying Playboy or Penthouse website. Sometimes your local ISP blocks certain websites because they receive instruction from the government after certain embarrassing scandals are exposed.
Whatever the reasons, it’s annoying for users to be treated as if they couldn’t think for themselves. The last thing social media users want are to be brainwashed by certain propaganda without alternative media to tell a different story. So, when you’re hit with “Error 404” page on certain websites, it’s time to bypass the blocking. Here’re top eight ways to get around it.

Solution For Desktop / Laptop (Windows / MAC)
{ Option-1 } Change DNS Settings
If you’re not a technical guy, chances are your DNS is pointing to your local ISP’s DNS, which in turn is at the mercy of the authorities. If the authorities happen to be a rogue government who doesn’t like a website which criticizes their corruption or brutality, they would tell the ISP (Internet Service Provider) to block the website. DNS blocking is the first thing the ISP will do.
When you try to access a blocked website, the ISP’s DNS says you can’t proceed and throws you an “Error 404”. Screw the ISP. You’re a grown up adult and not a child who must be told what to read and what not to read. You’re going to change your DNS settings to use Google Public DNS. So, here’s how to free yourself from the evil claws.
{ Option-1A } Change DNS Settings on Windows 7
- Click on “Start” button and click on “Control Panel”.
- Click on “Network and Internet”.
- Click on “Network and Sharing Center”.
- Click on “Change adapter settings”.
- Choose the connection you use to access the Internet
- example: Local Area Network – click “Properties”
- example: Wireless Network Connection – click “Properties”
- Select “Networking” tab
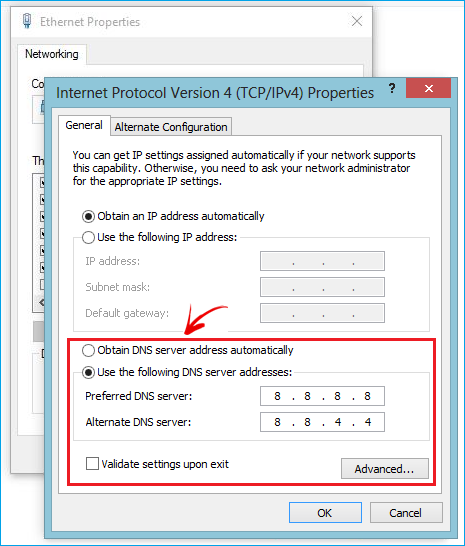
- Click “Internet Protocol Version 4 (TCP/IPv4)”
- Your default is “Obtain DNS server address automatically”
- Change it and select “Use the following DNS server addresses”
- Enter 8.8.8.8 as your “Preferred DNS Server”
- Enter 8.8.4.4 as your “Alternate DNS Server”
- Click “OK” to save and exit.
{ Option-1B } Change DNS Settings on MAC OS
- Click on “Apple”, choose “System Preferences”, and select “Network”.
- Choose the connection you use to access the Internet
- example: Built-in Ethernet – click “Advanced”
- example: Airport – click “Advanced”
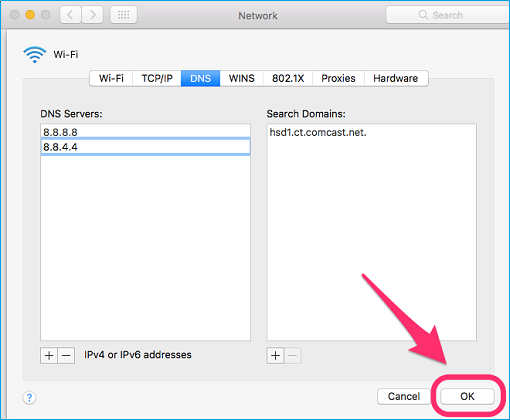
- Select “DNS” tab
- Click+ at the bottom of the DNS Servers list
- Enter 8.8.8.8 and 8.8.4.4 as your DNS Server (for TCP/IPv4)
- Click “OK”, click “Apply”
You should be able to access blocked websites after changing your default DNS settings, which was pointing to your router, which in turn got its DNS settings automatically from the local ISP. Reboot your computer if it doesn’t work. So, if you want to give it a second layer of punch, change the router’s DNS settings to the same Google Public DNS too.
{ Option-2 } Add A Browser Extension
But what if the above option-A (changing DNS settings) on a Windows or Mac is too complicated that it could lead you to commit suicide? Before you grab a knife and start stabbing yourself, here’s another option – unblocking websites in your browser. Take note that we’re still in the subject of desktop / laptop, not smartphone or cellphone.
{ Option-2A } For Google Chrome Browser
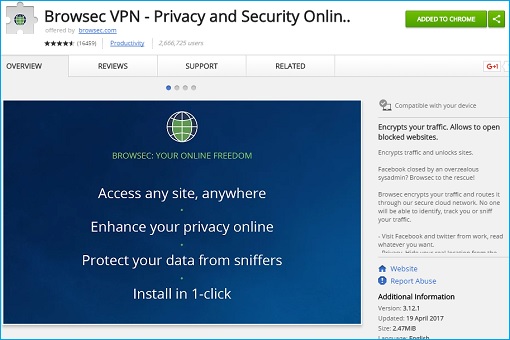
If you’re using Google Chrome browser, do you know that there’re tons of “extensions” to be added to the browser? Like Apple’s AppStore or Android’s PlayStore, Chrome has its own Chrome Web Store too. One of my favourite proxy extensions is “Browsec“, but you can always choose “ZenMate” or others to your liking. Here’s how to add the extension.
- Open your Chrome browser.
- Click this link – “Browsec” – to install
- Click “+ Add To Chrome” button on top right
- It prompts for permission – Click “Add extension” button
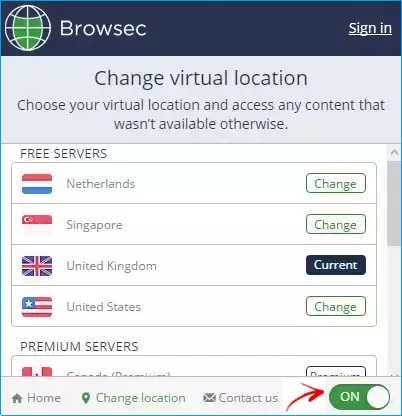
- A new icon-button appears on top right of Chrome browser toolbar.
- Click the “Browsec Icon” on the browser toolbar
- Turn “ON” traffic protection for your browser
{ Option-2B } For Mozilla Firefox Browser
Both “Browsec” or “ZenMate” are also available for Firefox fans. The installation steps are pretty much the same as Chrome. Just click on Browsec or ZenMate to install it as an extension to your Firefox browser. Click “Browsec Icon” or “Zenmate Icon” on top right of the browser toolbar to activate it. Once activated, you can start browsing all the blocked websites.
{ Option-3 } Use TOR Browser
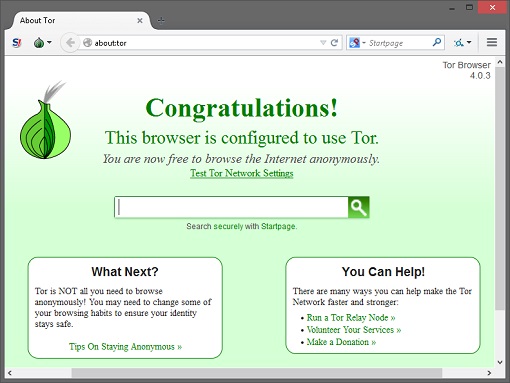
Technical guys would appreciate TOR browser, the preferred browser for hackers. TOR (short for The Onion Router) was initially a worldwide network of servers developed with the U.S. Navy that enabled people to browse the internet anonymously. It’s so secured that even the FBI is finding it hard to hack your identity, let alone your local ISP.
{ Option-4 } Use VPN (Virtual Private Network)
Now, if you don’t think you can stomach Option-B (Add A Browser Extension), let alone Option-A (Change DNS Settings), then the laziest method is to search for free VPN on the Internet. The problem with VPN – its slower than the usual performance. Another downside of using the free version is that you will get ads during your browsing session.
Solution For Mobile Smartphone (Android and iOS)
{ Option-5 } Change DNS Settings (Android / iOS)
Similar to changing DNS settings in Windows or MAC, you can actually change the same settings in your Apple iPhone or iPad or Android. When your smart devices get WIFI connection, they are automatically assigned the DNS based on router configuration. Still, you can bypass them, if websites you wish to access are blocked by the local ISP.
{ Option-5A } Change DNS Settings on Android
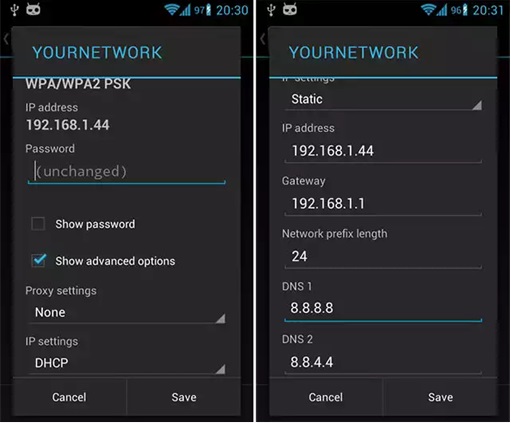
- Open “Settings”.
- Long-Press “Wi-Fi” you’re connected to.
- Tap “Modify Network Config”
- Tap the box next to “Show advanced options”. Scroll down.
- Tap “DHCP”, select “Static IP”, and scroll down.
- Modify “DNS 1” to 8.8.8.8 and “DNS 2” to 8.8.4.4
- Tap “Save”.
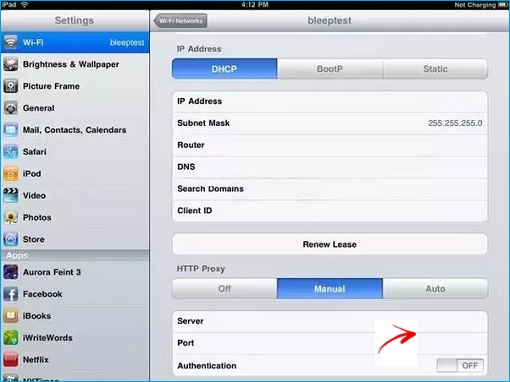
{ Option-5B } Change DNS Settings on Apple iOS
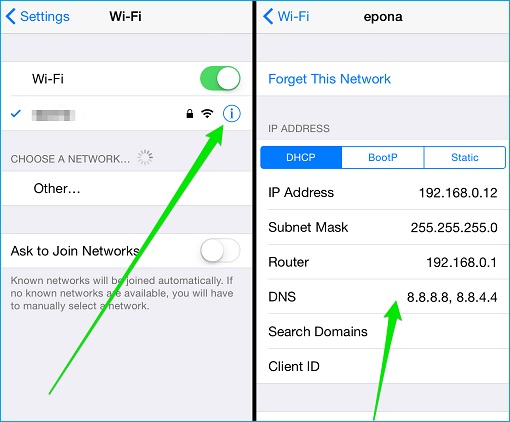
- Open the iPhone / iPad “Settings”
- Tap on Wi-Fi. If it’s switched off, turn it on.
- Select a Wi-Fi network and tap on the blue “i” icon
- Tap on the text-field across the DNS label
- Enter the DNS addresses with Google DNS address: 8.8.8.8, 8.8.8.4
- Tap on Wi-Fi on top to go back. The changes are saved automatically.
{ Option-6 } Enable Chrome Data-Saver (Android Only)
If you’re using Android phone (not iPhone iOS), the solution could be as simple as three steps to access blocked websites. Basically Google Chrome browser has this “Data Saver” feature which enables you to surf a website through Google Proxy which is protected by SSL. This is like changing the DNS settings (Option-A above) but in an easy Step-1-2-3.
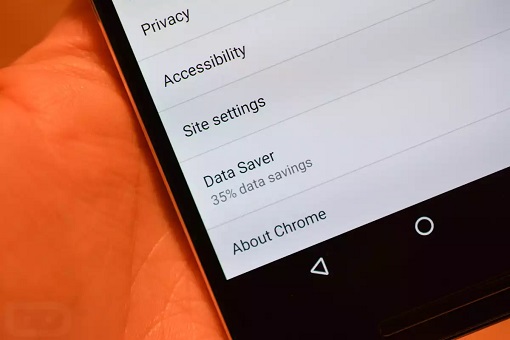
To enable Data Saver on Android:
- Open Chrome and press the “Action Overflow Button”(three vertical dots) in the upper right corner.
- Tap “Settings”. Scrow down and touch “Data Saver”.
- On top right switch hit it to “ON”
By turning this feature “ON”, your phone essentially talks to Google Public DNS, not your local ISP DNS. Another reason why you should enable the “Data Saver” is it helps compress and encrypt your data, so you save tons of money on data usage. Unfortunately, Apple doesn’t like this “Data Saver” feature for obvious reason; hence it won’t work on iPhone.
{ Option-7 } Use VPN (Android / iOS)
Just like desktop / laptop, VPN is the magic wand for both Android and iOS smartphones. You just need to search Apple’s AppStore or Android’s PlayStore for free VPN apps with high downloads and 5 stars and the magic word – FREE. Again, the downside of using the free version is that you will get ads and a slower than usual performance.
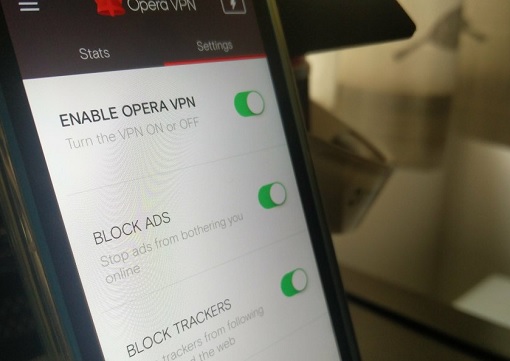
If you’re still on the obsolete version of Apple iOS such as iOS 7, there’s a built-in VPN feature. You just need to go to “Settings”, choose “Free VPN” and flip the switch “ON”. In latest iOS, however, Apple had taken this out due to a number of security vulnerabilities. Therefore, you need third-party VPN such as ExpressVPN, TunnelBear or Opera VPN.
{ Option-8 } Use Proxy Server
A proxy server is a server that acts as a middleman, relaying your request for connection to a webpage, file, or service on the Internet. It gets you around the DNS block because the proxy server doesn’t rely on our local ISP’s DNS servers. The downside to using a proxy is that all your passwords, cookie information, etc is being passed to the middleman.
We’ll not drill into how to use proxy server since this method is as complicated, if not more tedious, than changing DNS settings. Furthermore, there’re simpler methods to get around local ISP blocking as mentioned above. But if you insist, launch your browser – any browser – and search for free proxy server such as HideMyAss and pump in the website address (e.g. www.financetwitter.com) and click “Hide My Ass!”
Other Articles That May Interest You …
- Sorry Folks, Najib Not Resigning – Here’s Why He Promotes His Cousin
- S.O.S. China – Stupid & Arrogant Najib Causes Hostage Crisis In North Korea
- Swiss A.G. – Najib’s 1MDB Scammed At Least $800 Million Using “Ponzi Scheme”
- Here’s Why U.S. Uses “Malaysian Official 1” To Link PM Najib To Stolen Money
- Don’t Say We Didn’t Warn You – Get Ready For 8% GST Next Year (2017)
- WSJ’s Last Bombshell For The Year – Najib’s $700 Million Came From 1MDB
- By Hiding Again From IACC, 130 Countries Assume Najib Is Guilty
- Here’re 14 Crazy Facts How Huge (1MDB) RM42 Billion Debt Is

|
|
April 20th, 2017 by financetwitter
|


|

|

|

|

|

|


Your methods are too tedious for non tech savvy people.
Simple solutions:
1. Firefox extensions – Hotspot Shield
2. Chrome extensions
3. Opera Turbo
No download and technical setting required.